If you’re anything like me, then you LOVE fall weather. Unfortunately, being farther south than I’m used to, it’s still in the high 80/90 degree range, but come September 22nd, I will without a doubt be decorating my house inside and out for fall. However, if you are nothing like me, and you just love the summer time, don’t worry! I’m not wishing away your season or warmer weather.
I’ve done a few fall projects in the past weeks, and I’m going to share a favorite with you. I regret not taking step by step pictures, but it’s so simple, you will have no problem understanding! Now, I can’t take credit for the idea, because I did find it on Pinterest, but I will take credit for the rest!
Wooden Pumpkins!

For this I used scrap wood, mostly 2x4s that were leftover from the outdoor sofa I built a couple months ago. Stay tuned for that post a little later!
I started with the big orange pumpkin. I used my Ryobi Miter Saw to make all of the cuts. The biggest piece of wood on the orange pumpkin is in the center, and it is 12 inches. Above and below the 12 inch piece are 10 inch, then 9 inch, and at the very top is a 7 inch. I followed this same pattern for the smaller pumpkins.
All I used to attach each piece of wood was Gorilla Wood Glue. So far, so good, the glue has held it all together very well, and I expect it to stay that way. When you are using wood glue, it is best to use something to press everything together, allowing the glue to bring the wood together and form a bond. I have a clamp, but not one big enough for the entire pumpkin (Putting that on my Lowes shopping list), so I used a heavy box and set it on top.
Forgive the messy background, I had a lot of projects going on at once!

Now, I must admit that I should have waited to glue the stem on until after the pumpkin was painted orange. (and I did wait on the other two pumpkins) But that’s okay! Nothing a little painter’s tape couldn’t fix!
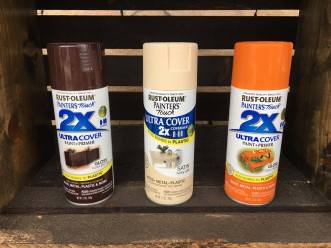
The next step- after the glue dries- is to paint! You can be as creative as you want with this. Recently, I’ve been into painting one color, then another, and distressing. By doing that, you can see both colors, and it gives a really cool effect! I first painted this pumpkin with brown spray paint. After it dried, I went over top with orange spray paint.
Then the fun part- distressing.
You can distress anything by hand with a sanding block, sand paper, or power sander. I happened to use my detailing power sander from Harbor Freight, that was only…..$17! An important fact about me is that I love a good deal.
Voila! The pumpkins are finished and ready to display inside or outside! SUPER SIMPLE!
Share your wooden pumpkins with me after they are finished! Good luck!

I love your new blog I can’t wait to see what you create next. You are so creative.
LikeLiked by 1 person
Cute idea Devan
LikeLiked by 1 person